


Have you been applying your makeup and skincare in the wrong order this whole time?
Does it really matter if you put concealer on first or last? Or apply your sunscreen at the start or end? The answer – in short – is yes and here’s why.
Scroll below to find out the correct order to apply your beauty products:
Makeup
Step 1 – Primer
The art to makeup that lasts is primer, stresses Sam Hunt, lead pro artist for Smashbox Cosmetics. “Your makeup will only perform the exact way it’s designed to when it’s applied to primed skin.” It’s an essential every season but particularly in summer when humidity and makeup don’t mesh well. “Primer acts as a barrier ensuring that whatever happens throughout the day – oilness through the T-zone , sweat or humidity – your make-up is locked in place.”
Try: Smashbox Photo Finish Foundation Primer, $76
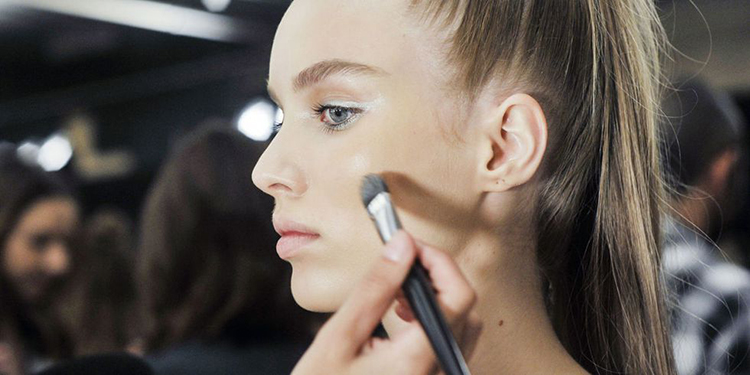
Step 2 – Foundation
Despite the many mixed messages surrounding foundation vs. concealer, make-up artists agree that your base should always be laid out by foundation first. Women tend to over-conceal when they apply concealer first. “Your foundation should do most of the work and then you can always go over any blemished again later,” explains Hart.
Step 3 – Concealer
“Concealer is three times stronger in coverage so only apply to areas that really need that extra coverage,” she warns. Opt for a lightweight concealer to avoid that cakey look.
Try: Bourjois Healthy Mix Anti-Fatigue Concealer, $30
Step 4 – Powder
Use powder to set your base and absorb any surface oil. “Sweep over trouble zones, chin and under-eyes to set but you don’t need much, only a light dusting to lock it down.”
Step 5 – Bronzer/blusher/highlighter
Define and enhance your natural face structure by adding a light wash of bronzer just beneath the cheekbones, followed by blusher and highlighter on top. Dust any excess highlighter left on the brush down the centre of your nose.

Step 6 – Eyeshadow, eyeliner and then mascara
Long and full lashes will get in the way when trying to apply liner and eyeshadow so always apply mascara last.
Step 7 – Brows
Now for the finale – whether you’re going for bold, feathered or natural, brows frame the face and complete your look so it makes sense to do them last.
Try: The BrowGal
Step 8 – Setting spray or finishing veil
If you want to go the extra mile invest in a setting spray or translucent finishing veil to ensure all-day wear.
Try: Nude by Nature Pressed Mattifying Mineral Veil, $35
Skincare
A comprehensive skincare regime bursting with skin-loving nutrients and antioxidants is all well and good but if you’re applying it in the wrong order, you may not be reaping the rewards. For optimum absorption and potency follow the order below:

Step 1 – Cleanser
Think of your morning cleanse as your wake-up call rather than a skincare necessity. A quick wash is fine as your skin will be relatively clean after a night’s sleep. Look for a cleanser with an invigorating scent and energising properties.
Try: Murad Refreshing Cleanser, $69
Step 2 – Toner
It’s important to restore you skin’s pH balance back to a normal level after cleansing. You should only need a few drops of toner on a cotton pad and it doesn’t need to be rinsed off.
Step 3 – Serums
We all have different skin so there’s no universal serum prescription that fits all. However, if you’re new to the world of serums a vitamin B serum for hydration and vitamin C serum for a more refined texture, is a great place to start. Remember, if you’re using more than one serum, always allow at least one minute for absorption in between applications.
Try: ASAP Super B Complex, $118
WATCH: Common mistakes you’re making when you cleanse your face
Step 4 – Moisturiser with SPF
It’s critical with our harsh sun that your morning moisturiser contains SPF – even when the sun doesn’t ‘appear’ to be out!
Try: Goodness Every Morning Moisturiser SPF15, $20
Step 5 – Eye cream
Don’t make the mistake of integrating eye cream into your regime when the first signs of ageing emerge – it should be used preventively far earlier! A targeted eye cream can do wonders for fine lines and concealing signs of fatigue. But do you really need a separate cream for the eyes? The answer is yes – the skin around your eye is very sensitive, which moisturisers for the rest of your face may not cater to! Bonus points if your eye cream has cooling features to keep puffiness and dark circles at bay.
Try: Clinique Pep-Start Eye Cream, $49 or Dermalogica Stress Positive Eye Lift, $115
Step 6 – Sunscreen (if your moisturiser doesn’t contain SPF)
Applying SPF straight after cleansing will render the rest of your products useless but popping it on at the end ensures your regimen can still work to its full potential.

Step 1 – Cleanse one
Double cleansing started in Korea and if their glowing complexions are anything to go by, this is a step not to be overlooked! Your first cleanse should be a make-up removing lotion, foam, oil, micellar water – whatever floats your boat – as long as it does the trick!
Try: Sothys Paris Micellar Cleansing Water, $62.50
Step 2 – Cleanse two
Now it’s time to actually clean your skin. Make sure your second cleanser really caters to your skin type and needs.
Try: Living Nature Sensitive Cleanser, $38 or Shiseido IBUKI Purifying Cleanser, $66
Step 3 – Masks or peels (once a week)
At-home masks and peels are a great way to give your skin some extra love and address specific concerns. They should only be applied once a week but check the label as a milder formulation may allow for additional applications. To get the full benefits, a mask needs to be applied to clean skin free of make-up and other residue.
Try: Osmosis Tropical Mango Barrier Recovery Mask, $126
Step 4 – Toner
Same as in the morning.
WATCH: Celebrities favourite beauty products of all time
Step 5 – Exfoliator (two to three times a week)
Exfoliation helps to rejuvenate your complexion by removing dead skin cells and polishing. It’s a common misconception that scrubbing strips the skin leaving it dry and red – in fact dead skin actually inhibits full absorption of all your skincare and can rob you of that sought after glow.
Try: Natio Renew Radiance Exfoliator, $22.50
Step 6 – Serums
Some serums contain ingredients that work better in the evening when your skin is renewing overnight. Retinol and vitamin A serums, known as powerhouse anti-agers, are best used at night.
Try: Ultraceuticals Ultra A Skin Perfecting Serum, $152
Step 7 – Moisturiser
Behold the answer to the golden question – do you really need both a day and night cream? Simply put, yes! During the night is when all the heavy lifting occurs so night creams place emphasis on restoration and moisture. They are generally thicker and feature slower absorbing ingredients than their morning counterpart. Common night time ingredients like hyaluronic acid are able to penetrate skin more effectively over several hours without interference from SPF.
Try: Trilogy Replenishing Night Cream, $65 or A’kin Firming Night Cream, $50
Step 8 – Eye cream
Same as in the morning.